HP Printer WPS Pin Setup: A Step-by-Step Guide!
Undoubtedly, the HP Printer WPS Pin Setup is the most convenient and easiest way to get your printer online. This setup process reduces the manual efforts and establishes a secure connection between your HP printer and your Wi-Fi router. So, if you are also looking to set up your printer with minimal effort, then walk through this guide. Additionally, you will find the easy instructions to set up the printer using the WPS PIN method in this post. Let’s walk through this guide!
Getting Started: HP Printer WPS Pin Setup!
To begin with the WPS Pin Code Setup, you must confirm that both the router and printer support the WPS functionality. Generally, this method involves the generation of a unique PIN from your printer to establish a secure connection.
However, you can also use the WPS push button method. But if the printer doesn’t have the button, you can use the PIN. Both methods don’t need the manual entry of the network name and password. To know the detailed instructions for this setup process, then, jump into the next section.
How to Carry Out the WPS Pin Code Setup On the HP Printer?
Before beginning with the HP Printer WPS Pin Setup, you must ensure that your router has a WPS (Wi-Fi Protected Setup) button. Further, it is important to follow the step-by-step instructions to complete this process. Let’s have a closer look!
- Firstly, place your HP printer and computer near the wifi router.
- Further, put your printer in the WPS setup mode as per your device type.
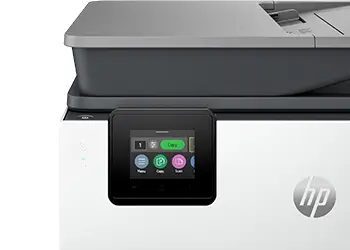
- For the Printers with a touchscreen control panel:
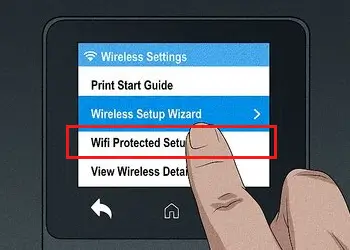
- Open the Setup, Network, or Wireless Settings.
- Here, choose the ‘Wi-Fi Protected Access’ and then select the ‘Push’ button.
- Then, tap ‘Start’ and you can now perform the WPS Pin Code Setup.
- HP DeskJet 6000, 6400, Tango, and ENVY 6000, 6400 printers:
- Initially, press & hold the WiFi and Power buttons simultaneously.
- Keep holding these buttons for 3 seconds.
- Then, you will see the Edge or wireless lights flashing.
- Finally, the WPS connection is established.
- Printers without a touchscreen control panel:
- Firstly, go to the printer’s touch screen panel and press the WiFi button.
- Hold down this button for around 5 seconds.
- After that, the LEDs on your printer start flashing, indicating a successful wifi connection.
- Now, press & hold the WPS button on the router for 3-5 seconds.
- Then, the WPS connection process starts.
- After that, return to the printer and check the wireless LED status.
- Now, restore the WiFi setup mode following the on-screen guidelines.
- Finally, the HP Printer WPS Pin Setup is finished.
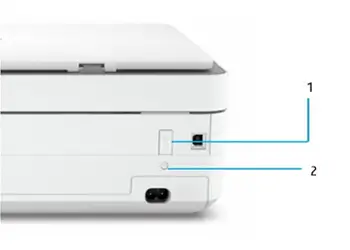
Quick Note: If you don’t know Where To Find WPS Pin On HP Printer, then see its back or side panel, or refer to the manual.
On the Whole
In short, the HP Printer WPS Pin Setup offers a streamlined approach to connect your printer wirelessly, with minimal manual efforts. By following the quick steps mentioned above, you can get the most out of your printer and achieve a secure, seamless, and better printing experience. For additional assistance or model-specific guidance, reach out to our professionals in the chat box!