An Ultimate Guide to the HP Designjet T2600DR Postscript Inkjet Setup!
Undeniably, a seamless printing experience starts with the right setup process, especially for professional printers like the HP DesignJet T2600DR PS inkjet. These handy printing devices are designed to deliver high-quality and seamless printing. However, to maximize the performance and efficiency of your printer, a proper HP Designjet T2600DR Postscript Inkjet Setup is a must.
Whether you are setting up the HP DesignJet T2600DR PS Inkjet printers for the first time or require assistance with the advanced printer configuration, this guide is for you. This Easy Setup HP Printer guide will embark on the step-by-step journey of installing, setting up, and optimizing your printer. So, to experience flawless printing, walk through this guide!
Unboxing & Initial Setup
First of all, when you initiate the HP DesignJet T2600DR PS Inkjet printer setup, carefully unbox the HP printer. Additionally, make sure your printer has all the required components, as given below:
- HP Designjet T2600DR PS Inkjet printer
- Ink cartridges and printhead
- Paper roll spindle
- Power cable
- User manual/installation guide, etc.
Complete Procedure For the HP Designjet T2600DR Postscript Inkjet Setup
Once you are ready with all the required things, you can move ahead with the printer setup. If you are interested in learning Easy Setup HP Printer, then follow the stepwise instructions below:
Initial Installation
- Initially, look around for a suitable location to install your printer.
- Make sure you place the printer in a ventilated area.
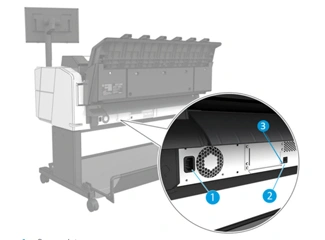
- Now, plug the power cable into your printer and attach it to the wall socket.
- After that, install the ink cartridges in the corresponding slots.
- Next, load the printheads and initialize the printer.
- Then, load the paper rolls into the printer and use the printer’s touchscreen to configure the paper size and type.
Wired/Wireless HP Designjet T2600DR Postscript Inkjet Setup
- Hereon, plug the ethernet cable into the printer’s network port (if you have a wired one).
- Then, connect the other end to your wifi router.
- Wait till your printer automatically detects the connection and connects to it.
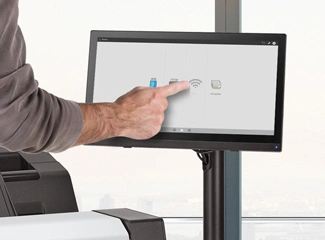
- For the wireless setup, go to the WiFi Settings from the printer’s touchscreen.
- After that, select your WiFi Name and enter its password.
- Now, wait for the connection confirmation message on the touchscreen.
Install Printer Drivers & Software
- Take note of the host name and IP address from the front panel.
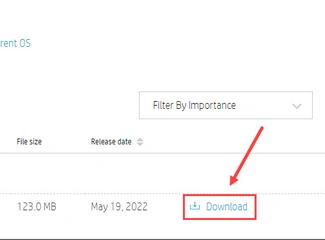
- On the wifi-enabled device, download the latest and compatible drivers for Windows/MacOS.
- Once the installation finishes, follow the on-screen installation instructions.
Setup Printer Services

- From the printer screen, go to the gear icon>Services and follow the guidelines.
- You can now receive automatic firmware updates and enable email printing and additional printer services.
- Now, install the HP Smart app to remotely access and configure your printer.
Final Words
Overall, the HP DesignJet T2600DR Postscript Inkjet Setup is a simple process if you follow the correct procedure. Using this quick guide, you will understand the smooth installation and steps to set up your HP printer effortlessly. Now, your professional-grade printer is all set to use, and enjoy a smooth printing experience.